Friday, March 30, 2012

Building FORTS!!


We are in week two of the fort enrichment class. The students are working in teams. Each team created a "theme" for their respective forts and we ended up with an Animal Daycare, a Hippie House, a Fun House and a Tiki Hut (how cool are those???). I encouraged them to write down their ideas during the brainstorming session. I included a photo of notes made by a first grader and a kindergartner because I was tickled pink that they had written down so many details!

I picked out wood for the kids that fit our circumstances.....my class is on the second floor so they have to fit on the elevator, be light enough to carry and big enough to keep in the hallway during the weeks of class. Then I cut wood pieces 1/16th the scale of the real pieces and the students built models of their future forts. They cannot have wood for their roofs and some of their walls need to be straw or bead curtains, etc. so that the forts stay as light as possible.

The BEST part about this class is the help given to us by one of my students wonderful fathers. They are a military family and dad has been serving in Afghanistan for the past year. The bonus is he that is an engineer and was willing to give us some guidance! I'll write a post all about his contribution to the class later this week!

A drawing lesson by investigating insects

This week we worked on the first half of a lesson about insects. I had an insect specimen for each student to use as a reference. They were so excited to see "real" bugs ;). The insects were a great hook to get them LOOKING while they are drawing. I included references, books and magazines on their tables so they were able to read more about their insect if they wanted to but my real goal was working on their drawing skills, teach them more about line quality and composition. As always, I was very impressed with their engagement!

Wednesday, March 14, 2012

Early morning Ice Sculpture made by the sculpture enrichment students


My goodness this was SO much fun!! In the middle of our 4 week after school sculpture class, it hit me that it would be cool to make an ice sculpture...the weather is perfect and I could work more color theory in with three dimensional elements.....so I set off to come up with a plan.

I raided the dollar store and Wal-Mart for any small,interesting shaped container that we could freeze water in. I found wonderful circle and rod shaped ice trays, little cups and flat plates. I had a decent stash of dried out markers I had saved that I figured would still bleed into water.

I took the kids outside one afternoon and brought the containers, dried out markers and lots of pitchers for water. They experimented with adding the markers to the water in each little container and created new colors by mixing markers. The black and the neon green marker were a HUGE hit!

I took over a space in our lunch room freezer and we planned to meet the next week about a half an hour before school. So bright and early we were putting our sculpture together in front of the school for display. It was fascinating to watch how the kids dealt with their hands getting cold (making art is uncomfortable at times!! ;)), the material changing and melting so they had to adapt their idea, working together as a team and seeing their hard work melt before their eyes. It was great to make art with them outside of the art room- a little change of scenery is always welcome.

I adored doing this! I was told that I have access to more freezer room (yippee!) so I plan to do this with more students during school hours. Until then, I will be saving those dried out markers.

Saturday, March 10, 2012

Race Car Rapture...


We entered into our science unit a couple of weeks ago. Our first lesson is one that I worked on collecting materials for the entire year (yikes). I am beyond excited to finally get all of this stuff I have stored for this lesson out of my room! ;)

When I searched how to make race cars out of recycled materials I found lovely images of fabulous cars at one of my most beloved art educator websites, http://manualscanigo.blogspot.com/. I tried to build them her way and several other ways but in the end.....hers was the best!

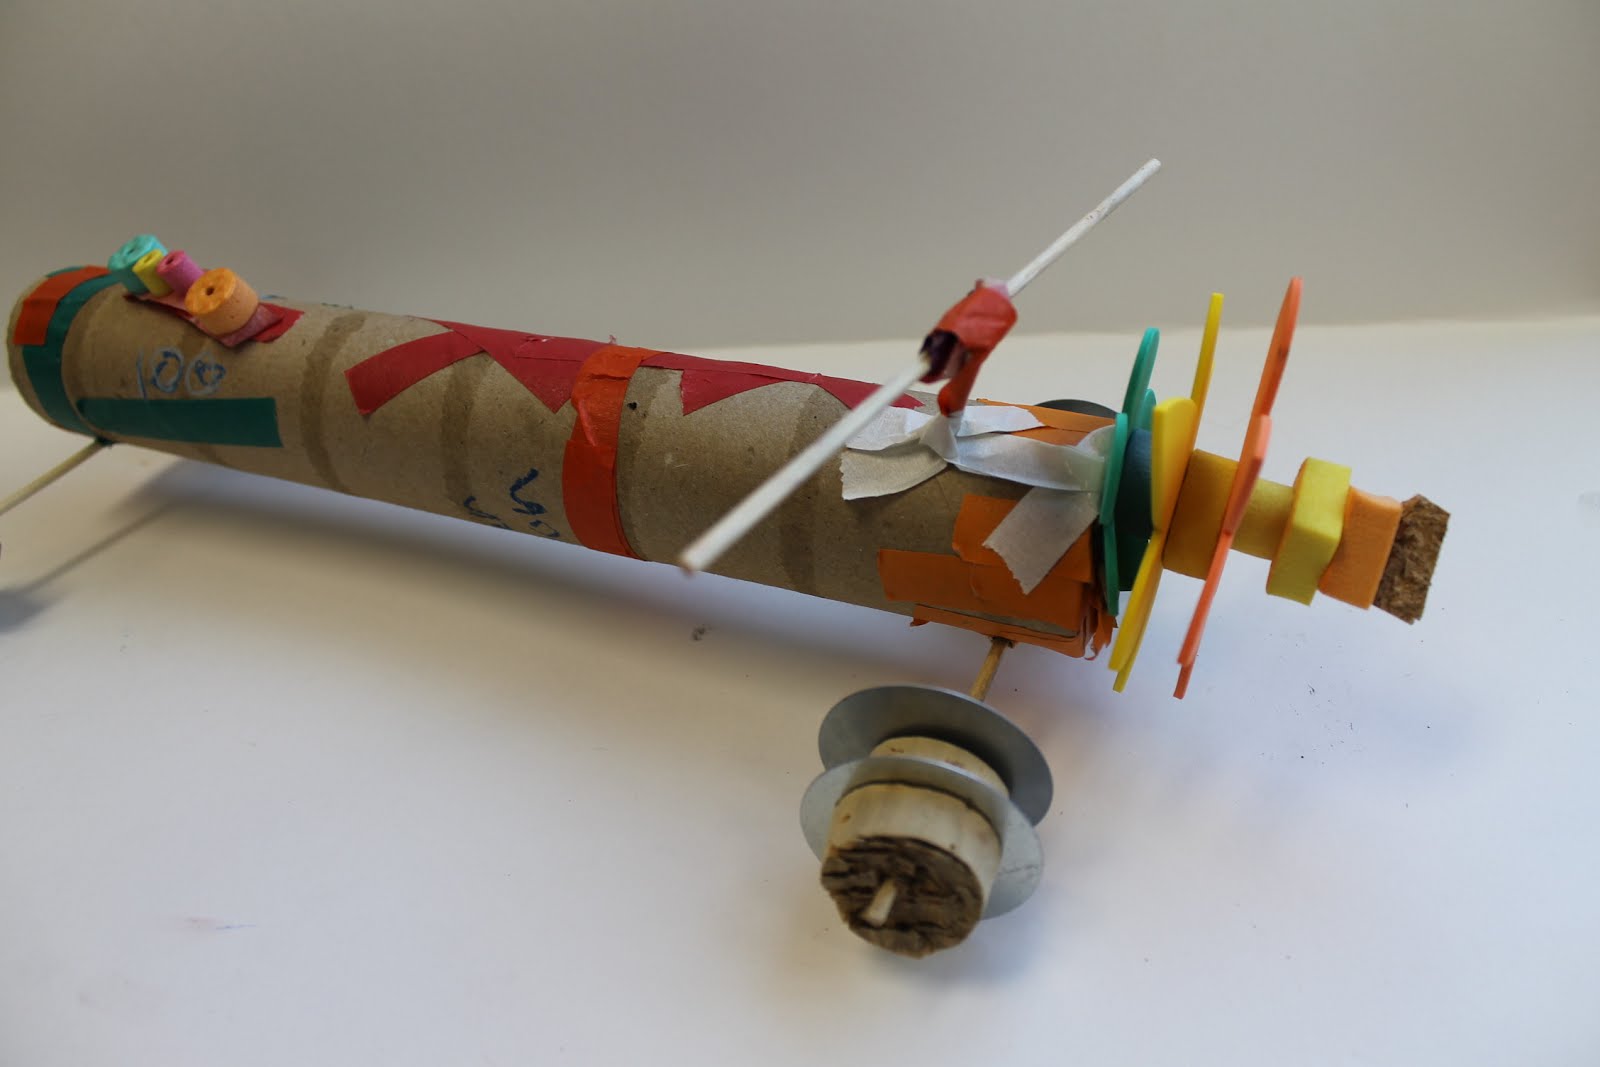
In terms of building...these were pretty difficult....but a GOOD kind of difficult! I drilled holes in every cork but they had to be small enough to still be tight around the skewer (axle) or they would slip off and not hold the wheels. Because they were small, it was tough for the kids to wiggle them onto the axle.....but with perseverance and a little help from me every once in a while, we eventually got them on ;). I worked one on one with each kindergartner because I didn't want them to stick themselves. It was actually really nice because it gave me a few minutes to devote specifically to each child.

Before we started building I read "Hot Rod Hamster" illustrated by Derek Anderson to the kindergartners. It was perfect because the hamster is making a lot of choices while building his race car and it gave me the opportunity to discuss attributes that are for aesthetic value or have a functional purpose. They would be making similar choices while building their "race car". The older grades were given a power point on how a NASCAR car is built. We talked about Newton's laws of motion and will explore it further on our last racing day.

I was amazed at everything the kids came up with to put on their cars!! I had a third grader bring in a peanut shell that she turned into a driver and made a little seat for. The top picture is from an incredibly hard working kindergartner who added fire to the back of his car and a wooden contraption out of toothpicks on the top- fascinating!! Most of the photos posted here are made by kindergartners.

I built a 4 lane track that I marked at every foot. I taped the ramp to delineate the lanes and carried the lanes onto the floor. From the top of the ramp to the end of the lanes was 18 feet. While we were racing we talked a lot about inches and feet and they tracked their distance every time they raced.

When we get back from spring break we will have one final race day. I'm making "blue ribbons" so each class can make up a ribbon for each student's car. I'm looking forward to a few silly awards ;). This lesson was an insane amount of work but was MORE than worth the result. These have been a couple of the most exciting weeks out of the year so far.

Thursday, March 1, 2012

Making ourselves into centenarians while reflecting on the 100th day of school ;)


Although I typically create my own lessons, I fell so in love with this one by Rama Hughes while reading one of my School Arts magazines (always a good resource for art educators!) that I couldn't pass it up. It also went perfectly in hand with what the kids were doing outside of the art room.

The week that we celebrated the 100th day of school our faculty decided to have our students dress up as if they were 100 years old. In the art room, we learned about what a centenarian is and we discussed what it might be like when we are 100 years old (interesting conversation! ;)). I had taken a photo of each student in the preceding weeks and printed them out as 8x10 black and white prints. I also printed out 8x10 photos of several centenarians that I found on the internet.

The students first traced their own picture on tracing paper. This is trickier than it sounds! I reminded them to see what the "real" shape of their eye or nose is....not just a circle or oval. Then they took their tracing paper and laid it over one of the centenarians photos. They traced the centenarians wrinkles, hair, moles, age spots, etc. onto their own faces and turned the drawing of themselves into a drawing of them at 100 years old. It was so fun to hear them explore what it might be like when they get wrinkled necks and can't see or hear as well.

I introduced what carbon paper is (they LOVED the carbon paper) and they transferred their tracing paper drawings onto thick paper. We discussed low lights and highlights on our faces as well as skin color. I gave them a few mixing color formulas for watercolor paints and let them experiment mixing their own too. They first painted in the low lights and then added the skin color. They painted their hair and backgrounds however they chose. We used watercolor pencils for details.

It was incredible how many skills and wonderful conversations we touched on in just one 2 week lesson!! It was also super adorable to see them come up with aging attributes they may have one day ;).